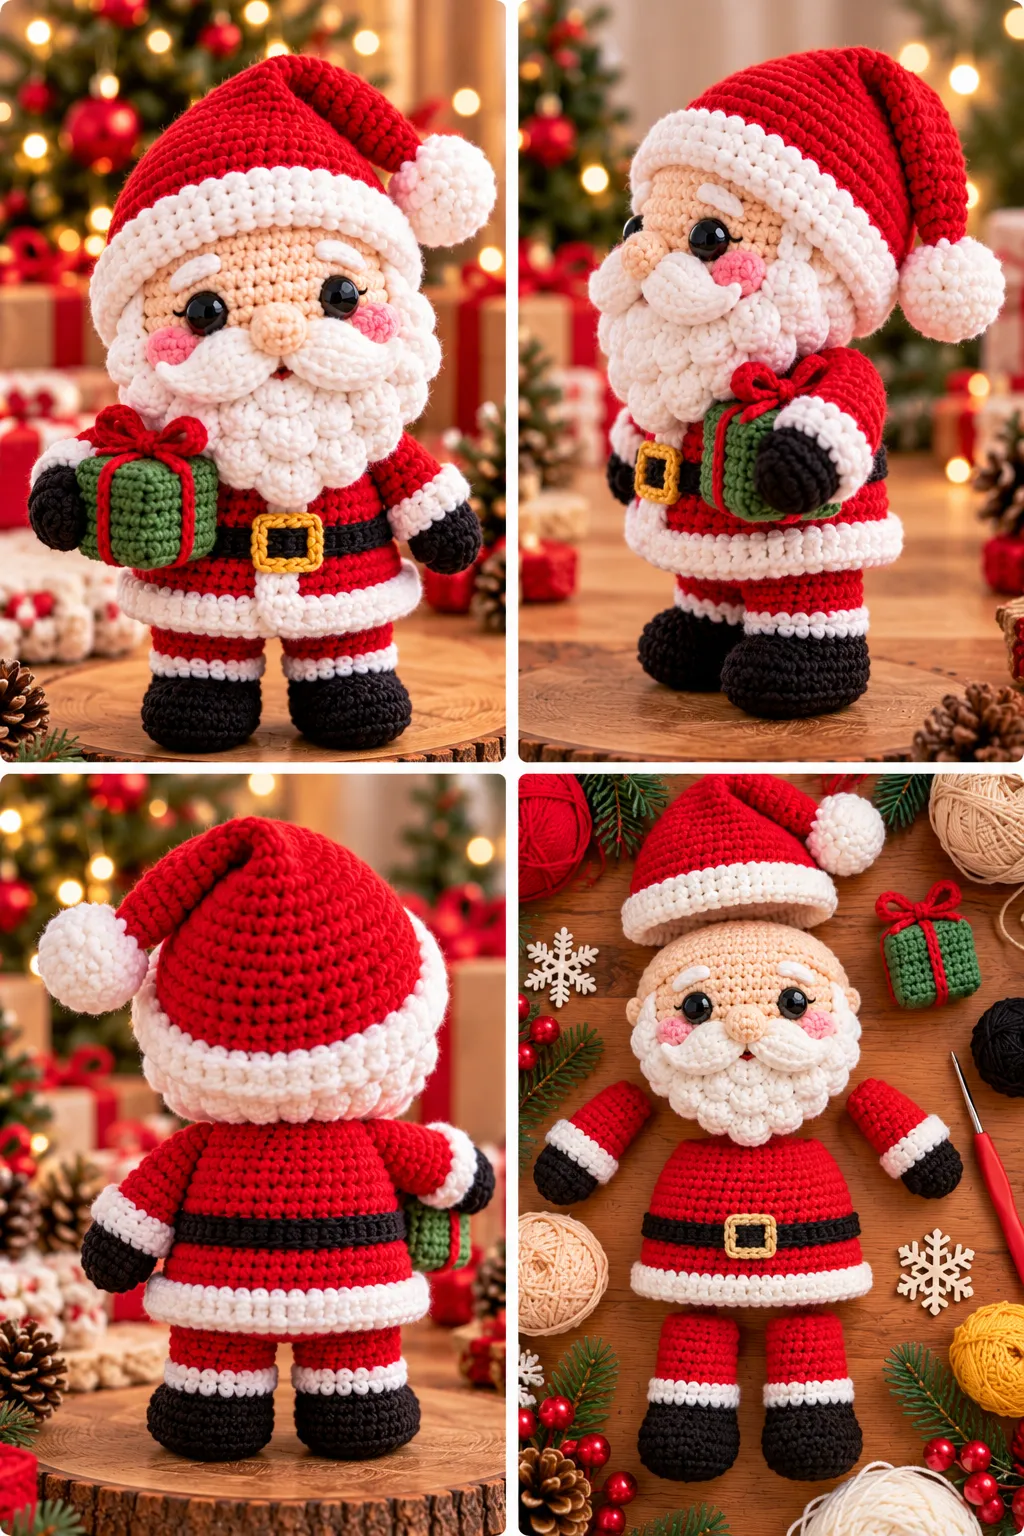
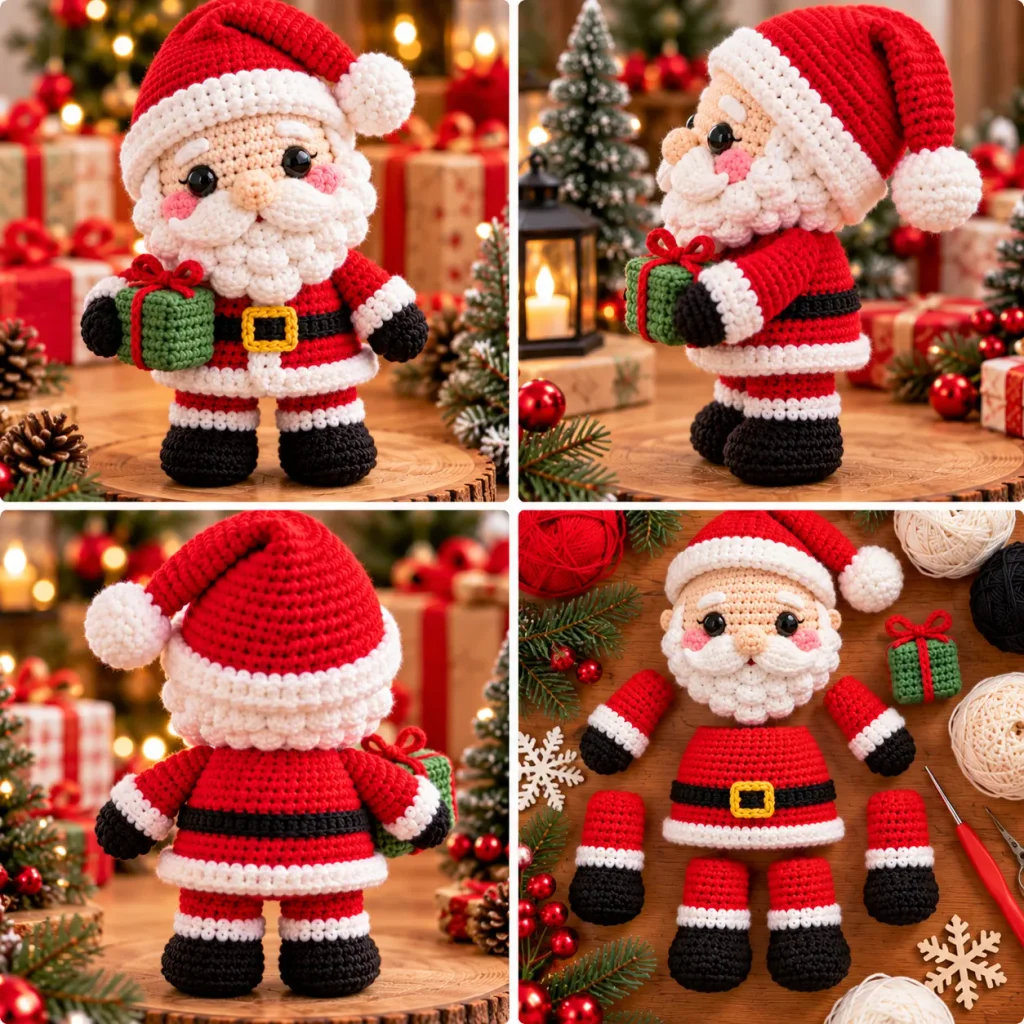
This title is very close to the Easy Crochet Santa Claus Pattern I wrote earlier, so I made a different design. This Santa is a chubby, egg-shaped little fellow, with the head and body worked in one piece, so there is much less sewing. He has a fluffy white beard, a floppy red hat, tiny boots, and a small brown sack full of presents. Set him on a mantel, tuck him into a gift basket, or give him as a handmade Christmas present.
Pattern Information
Skill level: Beginner to intermediate, with color changes, embroidery, and sewing.
Terms: US crochet terminology.
Construction: The head and body are worked in one piece in continuous rounds, changing from peach to red to black to red. The hat, beard, arms, boots, and sack are worked separately and sewn on.
Estimated size: About 15 cm (6 in) tall including the hat, using DK-weight cotton. Actual dimensions depend on yarn, tension, and stuffing.
Pattern note: This is an original design based on the title concept. Stitch counts have been checked, but the pattern has not been physically crocheted or independently tested. Adjust the shaping and feature placement to suit your yarn.
Materials
- DK-weight cotton yarn in red, approximately 25 g, for the body, hat, and arms.
- White yarn, approximately 15 g, for the beard, hat brim, pom-pom, and cuffs.
- Peach or light skin tone yarn, approximately 8 g, for the face and hands.
- Black yarn, approximately 8 g, for the belt and boots.
- Brown yarn, approximately 8 g, for the sack, and a little yellow for the buckle and gift ribbons.
- Pink thread for the cheeks and nose, and black thread for embroidered eyes.
- A 2.5 mm hook as a starting point (use a hook small enough to keep the fabric dense).
- Fiberfill, stitch marker, tapestry needle, scissors, and removable pins.
All features are embroidered, so this Santa is suitable for gifting to young children. Sew every part on firmly and skip the sack gifts for children under three.
Stitches and Abbreviations
| Abbreviation | Meaning |
|---|---|
| MR | magic ring |
| ch | chain |
| sc | single crochet |
| sl st | slip stitch |
| inc | 2 sc in one stitch |
| dec | invisible single crochet decrease over the next 2 stitches |
| sc2tog | single crochet 2 stitches together |
| st(s) | stitch(es) |
Work in a spiral without joining or turning unless directed otherwise. Numbers in brackets give the completed stitch count. Repeat parentheses the stated number of times. Move the marker at the start of every round. When you change color, switch on the final yarn-over of the last stitch of the previous round.
Before You Begin
Crochet tightly so the stuffing does not show through the stitches. Stuff firmly but evenly, adding small pieces rather than large clumps. Santa should be a plump egg shape, wider at the bottom. The beard and hat hide the top and bottom of the face, so only the middle rounds show, which is where the eyes and nose go.
Head and Body (peach, red, black, red)
Round 1: With peach, 6 sc in MR. [6]
Round 2: Inc in each stitch. [12]
Round 3: (Sc, inc) × 6. [18]
Round 4: (2 sc, inc) × 6. [24]
Round 5: (3 sc, inc) × 6. [30]
Rounds 6–9: Sc in every stitch. [30 per round; 4 rounds]
The face is Rounds 6–9. Embroider the eyes later, around Rounds 6–7, about 8 stitches apart. The nose goes on Round 8, and the beard covers Round 9 and below.
Round 10: Change to red. (4 sc, inc) × 6. [36]
Rounds 11–13: Sc in every stitch. [36 per round; 3 rounds]
Rounds 14–15: Change to black. Sc in every stitch. [36 per round; 2 rounds]
Rounds 16–17: Change to red. Sc in every stitch. [36 per round; 2 rounds]
Round 18: (4 sc, dec) × 6. [30]
Round 19: (3 sc, dec) × 6. [24]
Stuff firmly now, pushing the filling into the lower half.
Round 20: (2 sc, dec) × 6. [18]
Round 21: (Sc, dec) × 6. [12]
Round 22: Dec × 6. [6]
Fasten off, thread the tail through the remaining front loops, draw closed, and hide the end. The closed hole is the bottom. Flatten the bottom slightly so Santa sits upright. With yellow, embroider a small square buckle at the center front of the black belt.
Hat (red and white)
Round 1: With red, 6 sc in MR. [6]
Rounds 2–3: Sc around. [6 per round]
Round 4: Inc in each stitch. [12]
Round 5: Sc around. [12]
Round 6: (Sc, inc) × 6. [18]
Round 7: Sc around. [18]
Round 8: (2 sc, inc) × 6. [24]
Round 9: Sc around. [24]
Round 10: (3 sc, inc) × 6. [30]
Round 11: Sc around. Change to white on the final yarn-over. [30]
Rounds 12–14: With white, sc around. [30 per round; 3 rounds]
Sl st in the next stitch and fasten off with a long tail. Leave the hat unstuffed.
Pom-pom (white):
Round 1: 6 sc in MR. [6]
Round 2: Inc in each stitch. [12]
Rounds 3–4: Sc around. [12 per round]
Round 5: Dec × 6. [6]
Stuff lightly, close the hole, and sew to the tip of the hat.
Beard (white)
Worked flat in rows. Ch 15.
Row 1: Sc in the 2nd ch from hook and in each ch across. Turn. [14]
Row 2: Ch 1, sc in each st across. Turn. [14]
Row 3: Ch 1, sc2tog, sc in the next 10 sts, sc2tog. Turn. [12]
Row 4: Ch 1, sc2tog, sc in the next 8 sts, sc2tog. Turn. [10]
Row 5: Ch 1, sc2tog, sc in the next 6 sts, sc2tog. Turn. [8]
Row 6: Ch 1, sc2tog, sc in the next 4 sts, sc2tog. Turn. [6]
Row 7: Ch 1, sc2tog, sc in the next 2 sts, sc2tog. [4]
Fasten off with a long tail. For a fluffier beard, pull 3 cm (1.25 in) strands of white yarn through the edge stitches, knot, trim, and fluff them with a tapestry needle.
Moustache (make 2, white): Ch 6, sl st in the 2nd ch from hook, sc in the next 2 ch, hdc in the next ch, 2 hdc in the last ch. Fasten off with a long tail.
Note: hdc means half double crochet.
Arms (make 2)
Round 1: With peach, 6 sc in MR. [6]
Round 2: (Sc, inc) × 3. [9]
Round 3: Sc around. Change to white on the final yarn-over. [9]
Round 4: Sc around in white. Change to red on the final yarn-over. [9]
Rounds 5–8: Sc around in red. [9 per round; 4 rounds]
Fasten off with a long tail. Stuff very lightly.
Boots (make 2, black)
Round 1: 6 sc in MR. [6]
Round 2: Inc in each stitch. [12]
Rounds 3–4: Sc around. [12 per round; 2 rounds]
Fasten off with a long tail. Flatten and sew to the bottom front of the body, about 4 stitches apart, with the toes pointing forward.
Gift Sack (brown)
Round 1: 6 sc in MR. [6]
Round 2: Inc in each stitch. [12]
Round 3: (Sc, inc) × 6. [18]
Rounds 4–7: Sc around. [18 per round; 4 rounds]
Round 8: (Sc, dec) × 6. [12]
Rounds 9–10: Sc around. [12 per round; 2 rounds]
Stuff lightly, leaving the top loose. Fasten off with a long tail. Cinch the top gently and tie it with a short length of red or yellow yarn.
Mini gifts (make 2): With red and yellow, ch 5. Sc in the 2nd ch from hook and in each ch across. [4] Work 3 more rows of sc, 4 in each. Fasten off. Embroider a cross of yellow yarn on top for the ribbon. Tuck them into the opening of the sack and tack them lightly in place.
Assembly and Face
- Eyes: With black thread, embroider two small satin-stitch ovals on Rounds 6–7, about 8 stitches apart. Add a tiny white highlight to each if you like.
- Nose and cheeks: With pink thread, embroider a small round nose on Round 8 at the center front, and a patch of 2 or 3 horizontal stitches on each side below the eyes.
- Beard: Pin the top of the beard across Round 9, with the point hanging down over the chest. Sew around the edge with small white stitches.
- Moustache: Sew the two moustache pieces just under the nose, curling outward.
- Hat: Pull the hat down so the white brim rests above the eyes, at about Round 5. Sew all around with small stitches. Fold the tip to one side and add a tack at the fold.
- Arms: Sew the arms to the sides of the body at about Round 11, angled slightly forward.
- Sack: Sew the sack beside Santa, attaching it to one arm and the side of the body so it leans against him.
- Boots: Sew them on as described above.
Hide every tail and give the hat, arms, boots, and sack a gentle tug to check they hold.
Practical Tips and Troubleshooting
Santa leans. Flatten the bottom and sew the boots on at the same height. Add a little more stuffing in the lower half.
The face looks too small. Sew the hat on a bit higher, around Round 4, so more of the face shows.
The beard looks flat. Add more fringe, or sew a second beard piece behind the first.
The hat slides off. Sew around the brim with more stitches, or add a small tack at the back.
The stripes (belt) look uneven. Change color on the last stitch of a round and move the marker before the next round. A small jog is normal in spiral crochet.
FAQ
Can I make it bigger? Yes. Use chunky yarn and a 4 mm hook for a Santa about one and a half times larger, and add 2 extra plain rounds to the body.
Can I add safety eyes? Yes, for older children and adults. Use 6 mm safety eyes between Rounds 6 and 7.
Can I turn it into an ornament? Yes. Skip the boots and sack, and sew a ch-15 loop to the tip of the hat.
Can I make Mrs. Claus? Yes. Use a white or gray bun instead of the beard, and add a white apron or a green skirt over the body.
More Free Crochet Patterns
- Easy Crochet Santa Claus Pattern
- Crochet Christmas Toys Pattern
- Crochet Penguin Pattern
Save This Pattern
Pin this Cute Santa Claus Amigurumi Pattern to your Pinterest board for your next festive project. Happy crocheting!