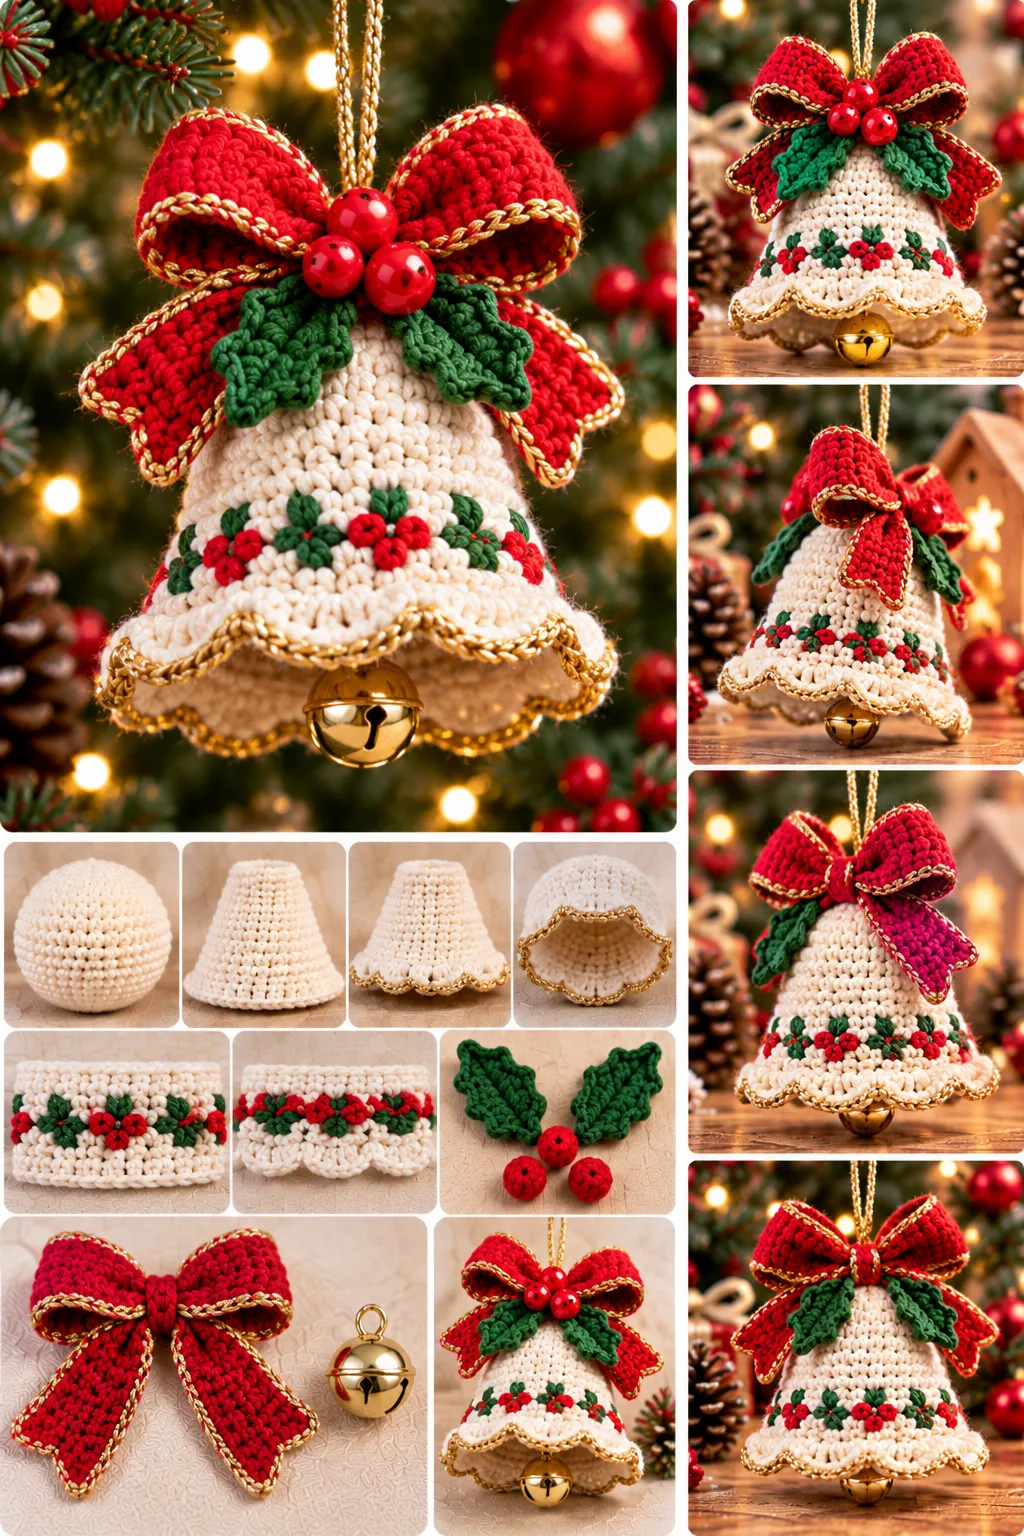
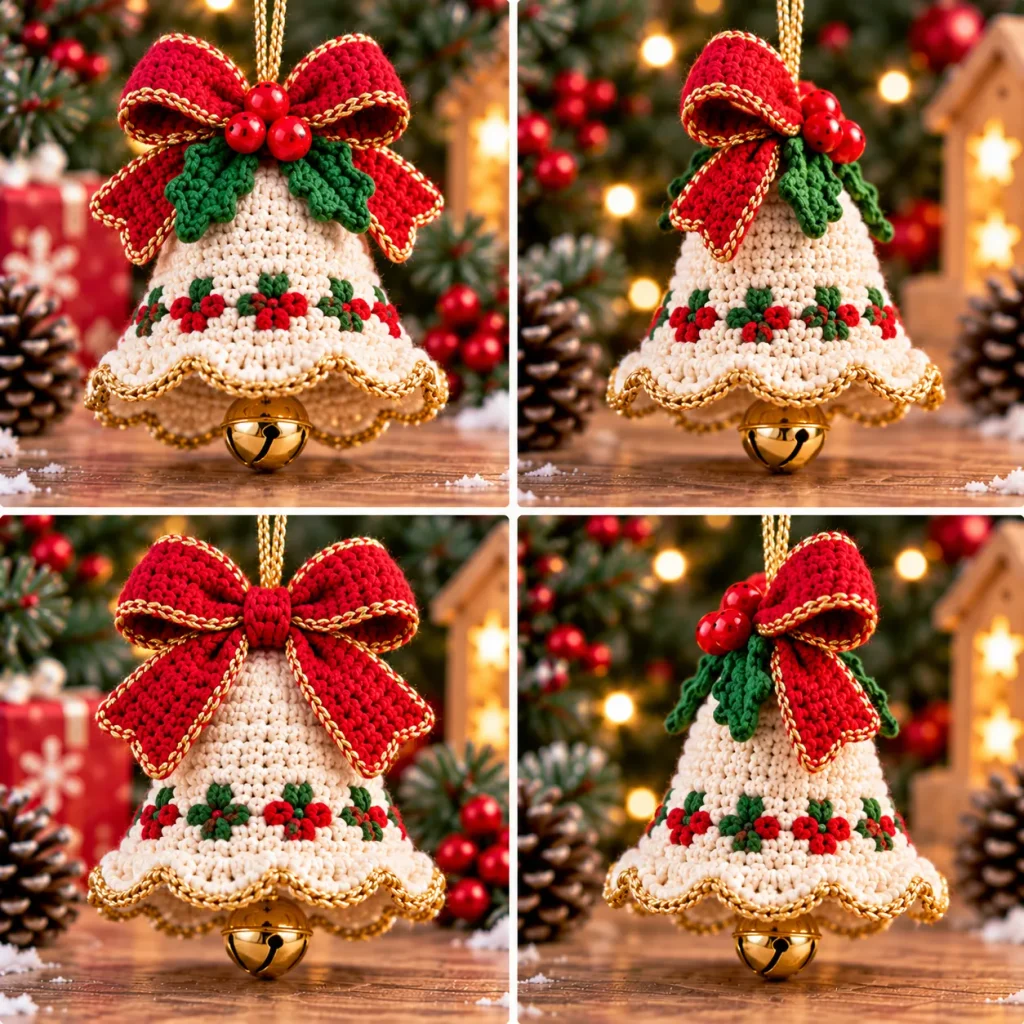
This Crochet Christmas Bell Pattern makes a small, plump amigurumi bell in festive red with a scalloped white rim, a little clapper, a sprig of green holly leaves with red berries, and a satin-ribbon hanging loop. It is worked in simple continuous rounds with basic increases and decreases, so it is a lovely quick project for confident beginners. Hang it on the tree, tie it to a gift, or string several together into a garland.
Pattern Information
Skill level: Beginner, with basic shaping and sewing.
Terms: US crochet terminology.
Construction: The bell is worked in one piece from the top downward in continuous rounds, flaring out to a scalloped rim. The clapper and holly are worked separately and sewn on.
Estimated size: About 8 cm (3 in) tall and 7 cm (2.75 in) wide at the rim, using DK-weight cotton. Actual dimensions depend on yarn, tension, and stuffing.
Pattern note: This is an original design based on the title concept. Stitch counts have been checked, but the pattern has not been physically crocheted or independently tested. Adjust the shaping and feature placement to suit your yarn.
Materials
- DK-weight cotton yarn in red, approximately 20 g, for the bell.
- White yarn, approximately 8 g, for the rim and clapper.
- Green yarn, approximately 3 g, and a little red yarn for the holly leaves and berries.
- A 2.5 mm hook as a starting point (use a hook small enough to keep the fabric dense).
- About 25 cm (10 in) of narrow ribbon, or yarn for a ch-15 hanging loop.
- Fiberfill, stitch marker, tapestry needle, scissors, and removable pins.
- Optional: a small gold seed bead or gold thread for decoration.
Keep ornaments with small parts away from babies and children under three.
Stitches and Abbreviations
| Abbreviation | Meaning |
|---|---|
| MR | magic ring |
| ch | chain |
| sc | single crochet |
| sl st | slip stitch |
| inc | 2 sc in one stitch |
| dec | invisible single crochet decrease over the next 2 stitches |
| dc | double crochet |
| st(s) | stitch(es) |
Work in a spiral without joining or turning unless directed otherwise. Numbers in brackets give the completed stitch count. Repeat parentheses the stated number of times. Move the marker at the start of every round.
Before You Begin
Crochet tightly so the stuffing does not show through the stitches. Stuff the dome of the bell firmly, but leave the lower flare lightly filled so the rim can open out and the clapper can hang inside.
When you change color, switch on the final yarn-over of the last stitch of the previous round.
Bell Body (red)
Round 1: 6 sc in MR. [6]
Round 2: Inc in each stitch. [12]
Round 3: (Sc, inc) × 6. [18]
Round 4: (2 sc, inc) × 6. [24]
Rounds 5–7: Sc in every stitch. [24 per round; 3 rounds]
Round 8: (3 sc, inc) × 6. [30]
Rounds 9–10: Sc in every stitch. [30 per round; 2 rounds]
Round 11: (4 sc, inc) × 6. [36]
Round 12: Sc in every stitch. [36]
Round 13: (5 sc, inc) × 6. [42]
Round 14: Sc in every stitch. Change to white on the final yarn-over. [42]
Stuff the dome firmly now, and the lower part lightly.
Scalloped Rim (white)
Round 15: Sc in every stitch. [42]
Round 16: Skip 1 st, 5 dc in the next st, skip 1 st, sl st in the next st. Repeat around, ending with a sl st in the first stitch. [10 scallops plus 2 stitches left over, see note]
Note: 42 stitches do not divide evenly into groups of 3, so work 14 repeats of (skip 1 st, 3 dc in the next st, skip 1 st), changing to 3 dc scallops instead. This gives you 14 smaller scallops, each separated by a sl st. To keep the count simple, use this version:
Round 16 (scallops): Skip 2 sts, 5 dc in the next st, skip 2 sts, sl st in the next st. Repeat 7 times. [7 scallops, 42 sts used]
Join with a sl st to the first stitch, fasten off, and weave in the ends. Gently stretch the rim open so the scallops flare out.
Clapper (white)
Round 1: 6 sc in MR. [6]
Round 2: Inc in each stitch. [12]
Round 3: Sc around. [12]
Round 4: Dec × 6. [6]
Stuff lightly before closing. Fasten off with a long tail, but leave about 12 cm (5 in) of tail. Thread the tail through the top inside of the bell and tie it off securely so the clapper hangs just below the rim. Sew through several stitches to anchor it.
Hanging Loop
Cut 25 cm of ribbon, fold it in half, and sew both ends together at the top center of the bell, passing through the top several times. Alternatively, ch 15 in red, sl st in the first ch to form a ring, and sew it to the top center.
Holly Leaves (make 2, green)
Ch 7. Sl st in the 2nd ch from hook, sc in the next ch, hdc in the next ch, dc in the next ch, hdc in the next ch, sc in the last ch. Fasten off with a long tail.
Holly Berries (make 3, red)
Round 1: 4 sc in MR. [4] Pull tight, fasten off with a long tail, and gather into a tiny ball.
Sew the two leaves side by side at the top of the bell, near the loop, pointing outward. Sew the three berries in a small cluster at the base of the leaves.
Assembly and Finishing
- Check the clapper: The clapper should hang about 5 mm below the rim. Adjust the tail if needed.
- Attach the holly: Sew the leaves and berries firmly so they do not pull off.
- Decoration (optional): Sew a gold bead or work a few gold thread stitches around the rim.
- Shape: Press the bell gently between your palms to round the dome, and steam lightly to flare the rim if desired.
- Hide every tail and give each part a gentle tug to check it holds.
Practical Tips and Troubleshooting
The bell is too narrow. Add another increase round, (6 sc, inc) × 6 for 48 stitches, before the rim. Adjust the rim scallops to match.
The rim curls inward. Stretch it open and press with a damp cloth, or add a few stitches of fabric stiffener.
The clapper sticks out. Shorten the tail, or tie it higher inside the dome.
The bell looks lumpy. Add stuffing in small wisps, and shape it with your hands before sewing on the holly.
The ribbon slips. Sew it on with several passes and add a small knot inside the bell.
FAQ
Can I make a set? Yes. Make 3 bells in graduated sizes, using DK, sport, and fingering weight, and hang them together.
Can I make it bigger? Yes. Use chunky yarn and a 4 mm hook for a bell about twice the size, and add 2 extra plain rounds before the rim.
Can I use a real bell? Yes. Sew a small jingle bell inside the dome before closing, but only for decorations kept away from small children.
Can I use gold or silver? Absolutely. Use metallic yarn for the rim or the whole bell for a luxurious look.
More Free Crochet Patterns
- Crochet Christmas Decorations Pattern
- Tiny Crochet Reindeer Pattern
- Easy Christmas Crochet Bunny Pattern
Save This Pattern
Pin this Crochet Christmas Bell Pattern to your Pinterest board for your next festive project. Happy crocheting!