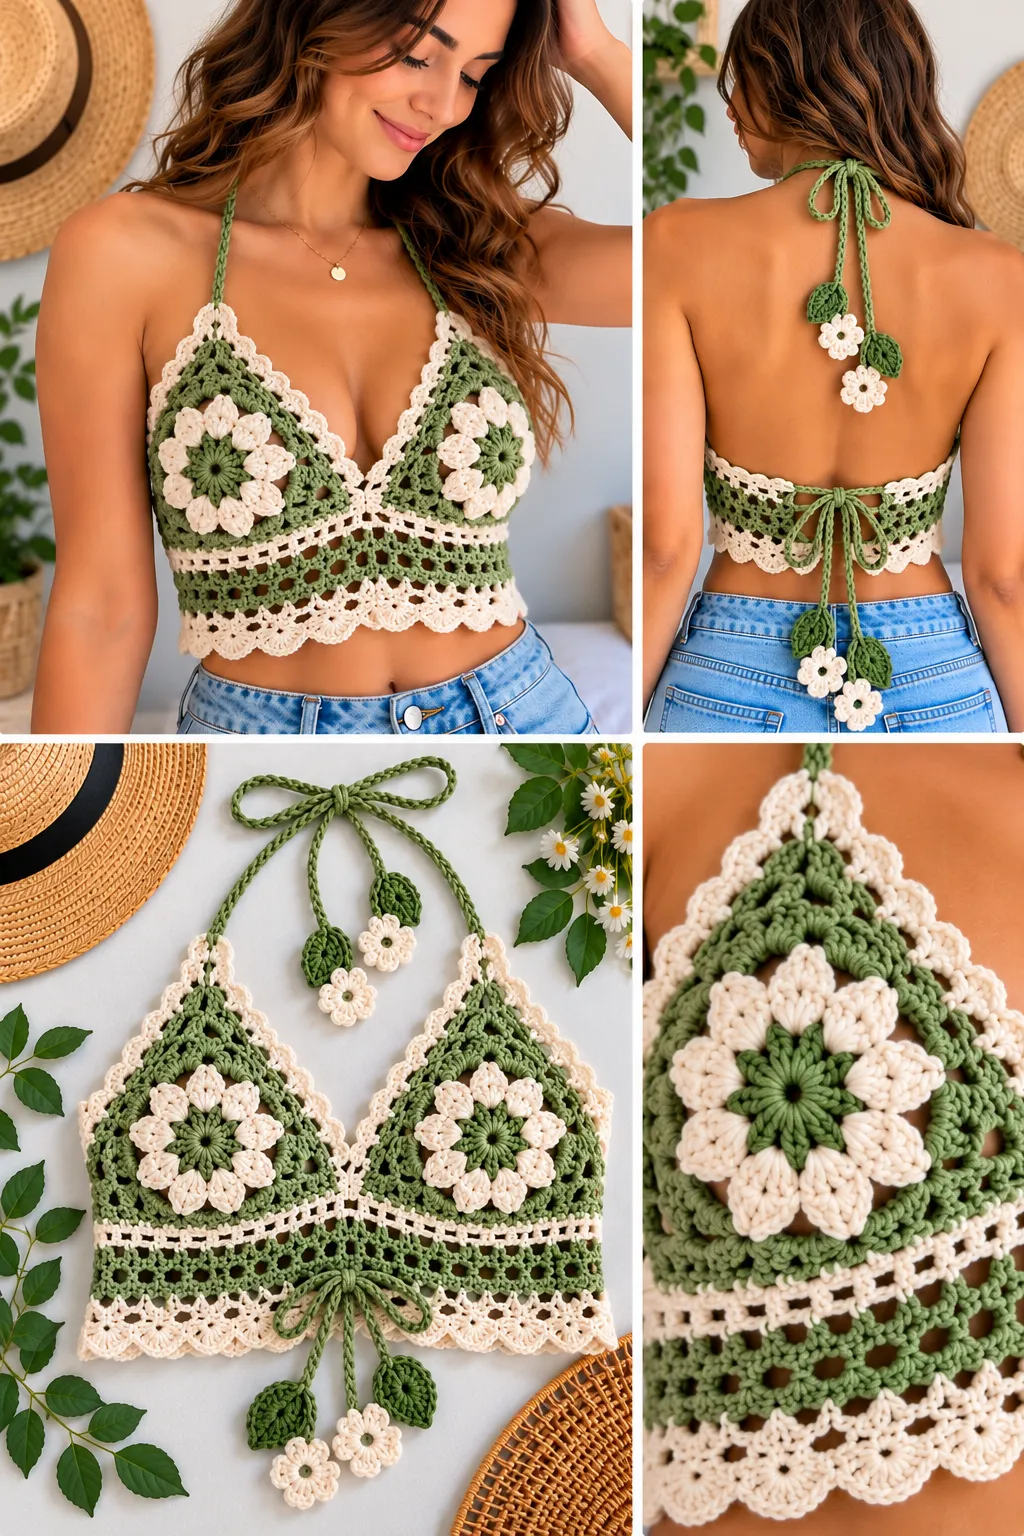
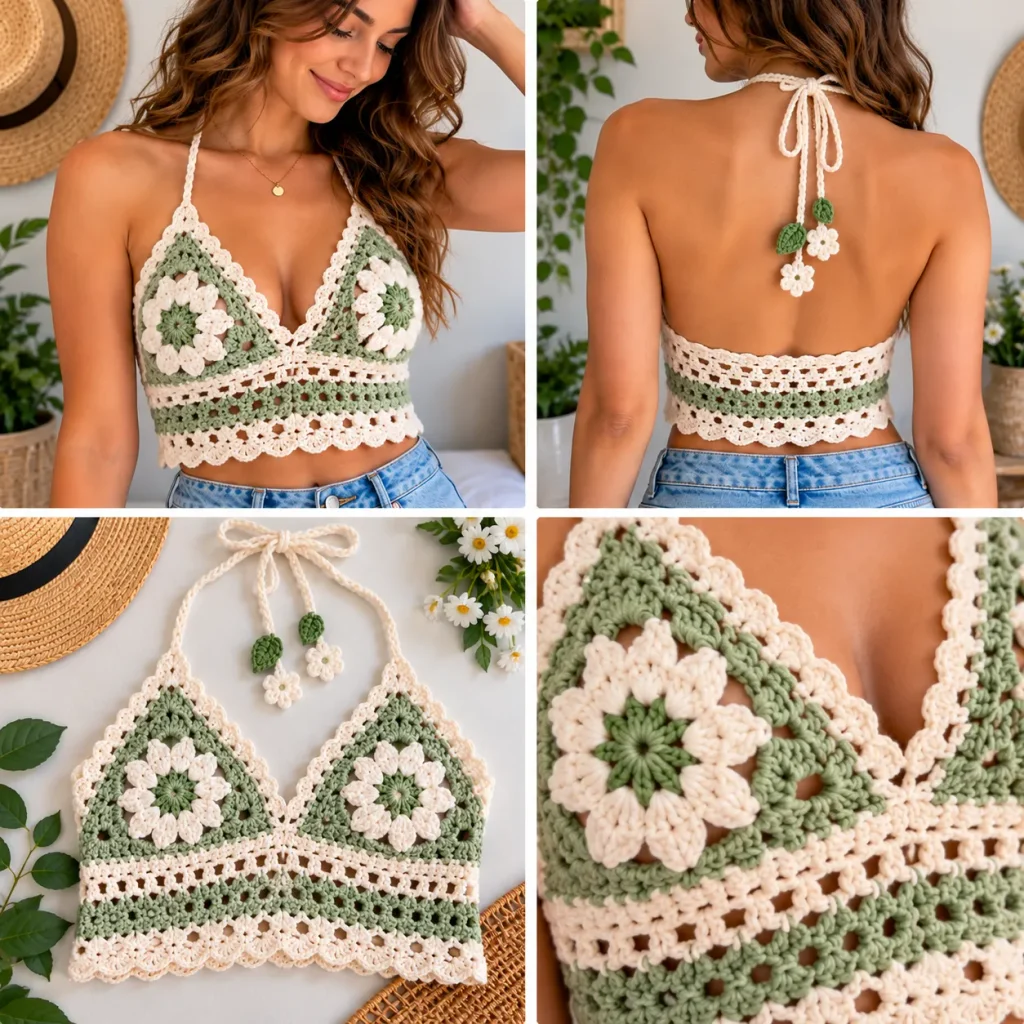
I already wrote three tops for you (the hdc tank, the mesh crop top, and the granny stripe crop top), so this one is a different design: a triangle tie halter with two triangle cups, a tie at the neck, and a tie at the back. There is no seaming at all. Each cup is a single triangle worked from the bottom point upward, and the ties are crocheted chains. The stitch is plain single crochet, so it is the easiest wearable pattern in this series. Wear it over a swimsuit, with high-waisted shorts, or under an open shirt.
Pattern Information
Skill level: Beginner, using only chains, single crochet, and decreases.
Terms: US crochet terminology.
Construction: Two identical triangles are worked flat from the bottom point up, increasing on each row. A band is worked along the bottom edge of each triangle, and the ties are worked as chains.
Sizes: S (M, L, XL), by cup size. Fits bust about 82 (90, 98, 106) cm / 32 (35.5, 38.5, 41.5) in. The ties adjust the fit.
Pattern note: This is an original design based on the title concept. Stitch counts have been checked, but the pattern has not been physically crocheted or independently tested. Always check your gauge, and try the first cup against your body before you make the second.
Materials
- DK-weight cotton yarn, approximately 50 (60, 70, 80) g, or about 125 (150, 175, 200) m.
- A 3.5 mm hook as a starting point (adjust to match the gauge).
- Tapestry needle, scissors, and a measuring tape.
Stitches and Abbreviations
| Abbreviation | Meaning |
|---|---|
| ch | chain |
| sl st | slip stitch |
| sc | single crochet |
| inc | 2 sc in one stitch |
| sc2tog | single crochet 2 stitches together |
| st(s) | stitch(es) |
Turning chains (ch 1) do not count as stitches. Numbers in brackets give the stitch count at the end of each row.
Gauge
20 sts and 22 rows = 10 cm (4 in) in single crochet.
Chain 22, work 24 rows of sc, and measure across 10 cm. If you have too many stitches, go up a hook size. If you have too few, go down.
Size Chart
| S | M | L | XL | |
|---|---|---|---|---|
| Cup width (top edge) | 17 cm | 19 cm | 21 cm | 23 cm |
| Cup height | 15 cm | 16 cm | 17 cm | 18 cm |
| Top-edge stitches | 34 | 38 | 42 | 46 |
| Rows | 33 | 35 | 37 | 40 |
Before You Begin
Each cup starts with 2 stitches at the bottom point and grows by 1 stitch at each end of every second row. Count your stitches every few rows. Try the cup against your body early, since cup height is the measurement that matters most. To add height, work extra plain rows after the increases stop.
Cups (make 2 the same)
Ch 3.
Row 1: Sc in the 2nd ch from the hook and in the next ch. Turn. [2]
Row 2: Ch 1, inc in the first st, inc in the last st. Turn. [4]
Row 3: Ch 1, sc in each st across. Turn. [4]
Row 4: Ch 1, inc in the first st, sc across to the last st, inc in the last st. Turn. [6]
Row 5: Ch 1, sc in each st across. Turn. [6]
Rows 6–33 (34, 36, 39): Repeat Rows 4 and 5, increasing on even rows and working plain on odd rows, until you have 34 (38, 42, 46) stitches. [34 (38, 42, 46)]
Check: each pair of rows adds 2 stitches, so Row 33 gives 34 stitches for size S. For M, L and XL, work to Row 35, 37 and 39 respectively, to reach 38, 42 and 46 stitches.
Final rows: Work 0 (2, 2, 2) plain rows if you want a little more height. Do not fasten off.
Top Edge Band and Neck Tie
Do not turn. Work along the top (widest) edge of the cup.
Row 1: Ch 1, sc in each of the 34 (38, 42, 46) stitches across the top edge. Turn. [34 (38, 42, 46)]
Row 2: Ch 1, sc in each st across. Fasten off.
Bottom Edge Band and Back Tie
Rotate the cup to work along one slanted side, the one that will sit against your ribcage.
Row 1: Join yarn at the bottom point. Ch 1, work sc evenly along the slanted edge, about 1 sc per row end. [about 33 (35, 37, 40)] Turn.
Row 2: Ch 1, sc in each st across. Do not fasten off.
Back tie: Ch 90 (100, 110, 120). Sl st in the 2nd ch from the hook and in each ch across. Fasten off.
Repeat on the other cup, working along the slanted side that faces the first cup.
Neck Tie
Join yarn at the outer corner of one top edge. Ch 120 (130, 140, 150) and sl st in the 2nd ch from the hook and in each ch across. Fasten off. Join yarn at the outer corner of the other cup’s top edge and make a second tie the same length.
Tie the two neck ties together at the back of your neck.
Assembly
- Join the cups: Place the two cups side by side, bottom points together. With the long tail, sew the inner slanted edges together at the center for about 2 cm (0.75 in), so the cups sit about 2 cm apart at the bottom.
- Weave in all ends.
- Try it on: Tie the neck ties and back ties, and check the fit. Move or shorten the ties if needed.
Finishing
Wash gently in cool water, press out the water in a towel without wringing, and lay it flat to dry. Cotton stretches when wet, so do not hang it up.
Practical Tips and Troubleshooting
The cups gape. Make a smaller size, or work 2 fewer plain rows and decrease the top edge with sc2tog at each end of the last 4 rows.
The edges are wavy. The stitch count changed. Count every few rows and mark the first stitch of the row.
The cups curl. Block them flat, and work the top-edge band with a slightly smaller hook.
The ties twist. Weave a flat braid, or make the ties in sc rows (ch 5, sc 4, 80 rows) instead of slip-stitch chains.
The halter slips down. Shorten the back tie or tie it higher on the ribcage.
FAQ
Can I use acrylic or cotton blend yarn? Yes. Check that it is DK weight and re-check your gauge. Cotton is best for hot weather and swimwear cover-ups.
Can I make it a swimsuit top? Not recommended. Crocheted cotton stretches and sags when wet, and it is not made for swimming. Use it as a beach cover or a sunny-day top.
Can I add a color stripe? Yes. Change color every 4 rows, carrying the yarn along the edge.
Can I make the cups larger? Yes. Work 2 more rows for each extra 1 cm in height, and add stitches in the top edge.
More Free Crochet Patterns
- Easy Crochet Top Pattern for Beginners
- Easy Summer Crochet Top Pattern (Mesh Crop Top)
- Easy Crochet Crop Top Pattern (Granny Stripe)
Save This Pattern
Pin this Beginner-Friendly Crochet Halter Top Pattern to your Pinterest board for your next wearable project. Happy crocheting!